Dear Tanglers,
today is the publishing day for my new Zentangle magazine “Zeichenglück” ! It’s a collection of 50 great patterns, some by Rick and Maria, some by Tanglers from Germany and Austria, and 19 brand new patterns by myself – most of which have not been published previously.
It’s a special day for me so I have something special for you, too: We’re going to take a closer look at the pattern Paradox and its variations! So grab your Micron and some good paper and let’s get started!
Paradox Workshop
In case you don’t know Paradox yet, here are the step-outs. (Never mind the German captions. 😉 This comes straight from the magazine!)
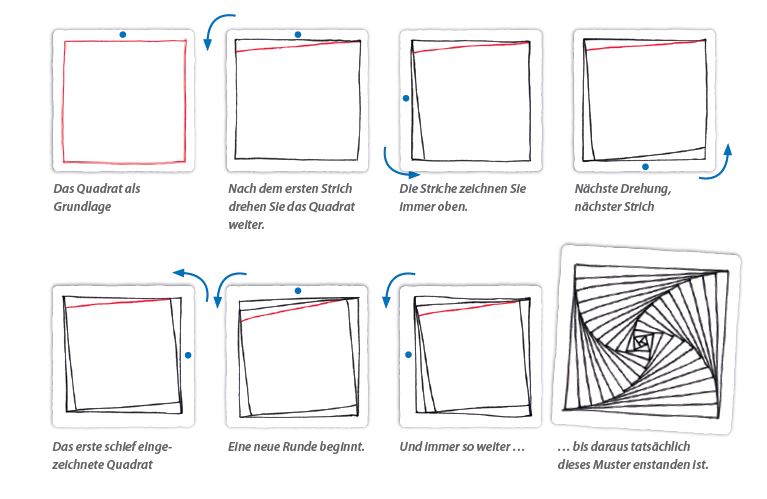
The crazy thing about Paradox is, that while we only draw straight lines, there will be lots of curves when we’re finished. And we can use these curves to our advantage.
So let’s play around with Paradox a little, shall we? The first thing that comes to mind is the distance between lines. You should always start at the wide end and work to a point. So what happens, when we change the starting point from close to farther apart? Here’s what I mean:
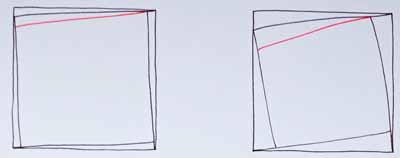
Task 1Draw two paradoxical squares, one with small and one with large distances between the lines. Which version do you like better? |
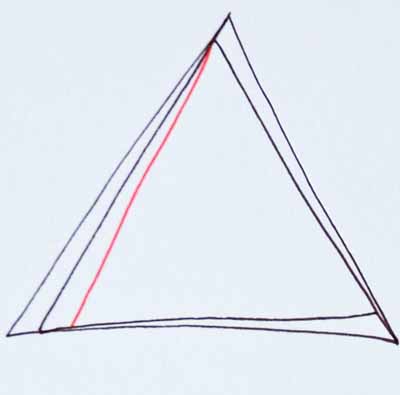
Next, we’re going to try different shapes with Paradox in them. What does Paradox look like in a triangle? And how do you draw it?
Easy! Just start the same way as you would in a square!
Of course you can try different shapes with more sides to them, too. How about this one, for example?
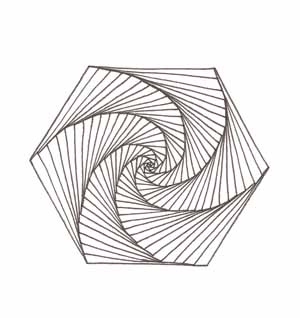
Task 2Draw Paradox into different shapes. Which one do you like best? How does a Paradox with 16 sides look? Do you like it? |
By the way: In the magazine, I show how to do Paradox in a circle. If you can’t figure it out, mail me.
You can draw Paradox in different directions: turning left and turning right. It just depends on where you start drawing your new lines. To change directions, simply put the wide end on the other side!
Like this:
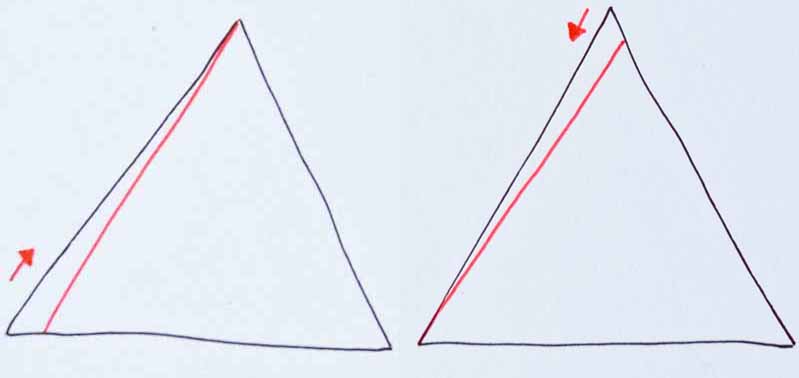
Task 3Draw a left turning and a right turning Paradox triangle. |
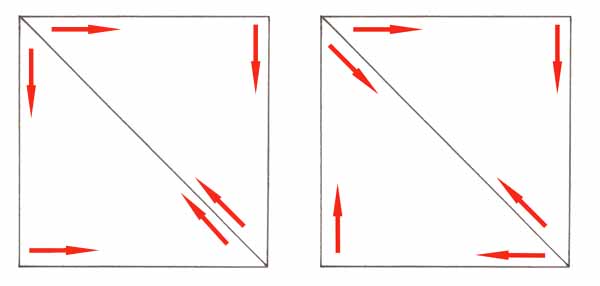
Now that you understand about the directions, we can use them to create different patterns. If you draw two Paradox triangles next to each other, a completely new pattern emerges. And it will look quite different, depending on the direction of the Paradoxes.
Task 4Draw Paradoxes like this:
Always start the from wide to pointy in the direction the arrows are pointing. |
Are you ready for some real Paradox magic? How about this string to begin with?
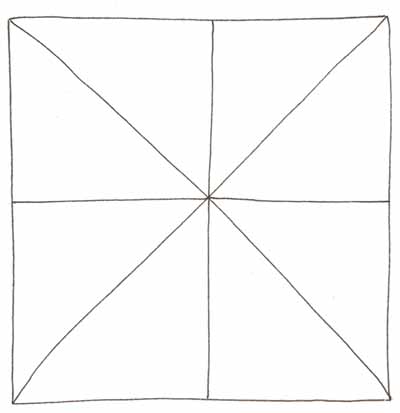
Task 5Draw Paradoxes into the string given above. Vary the directions. How many different combinations can you find? How do you like the resulting stars? |
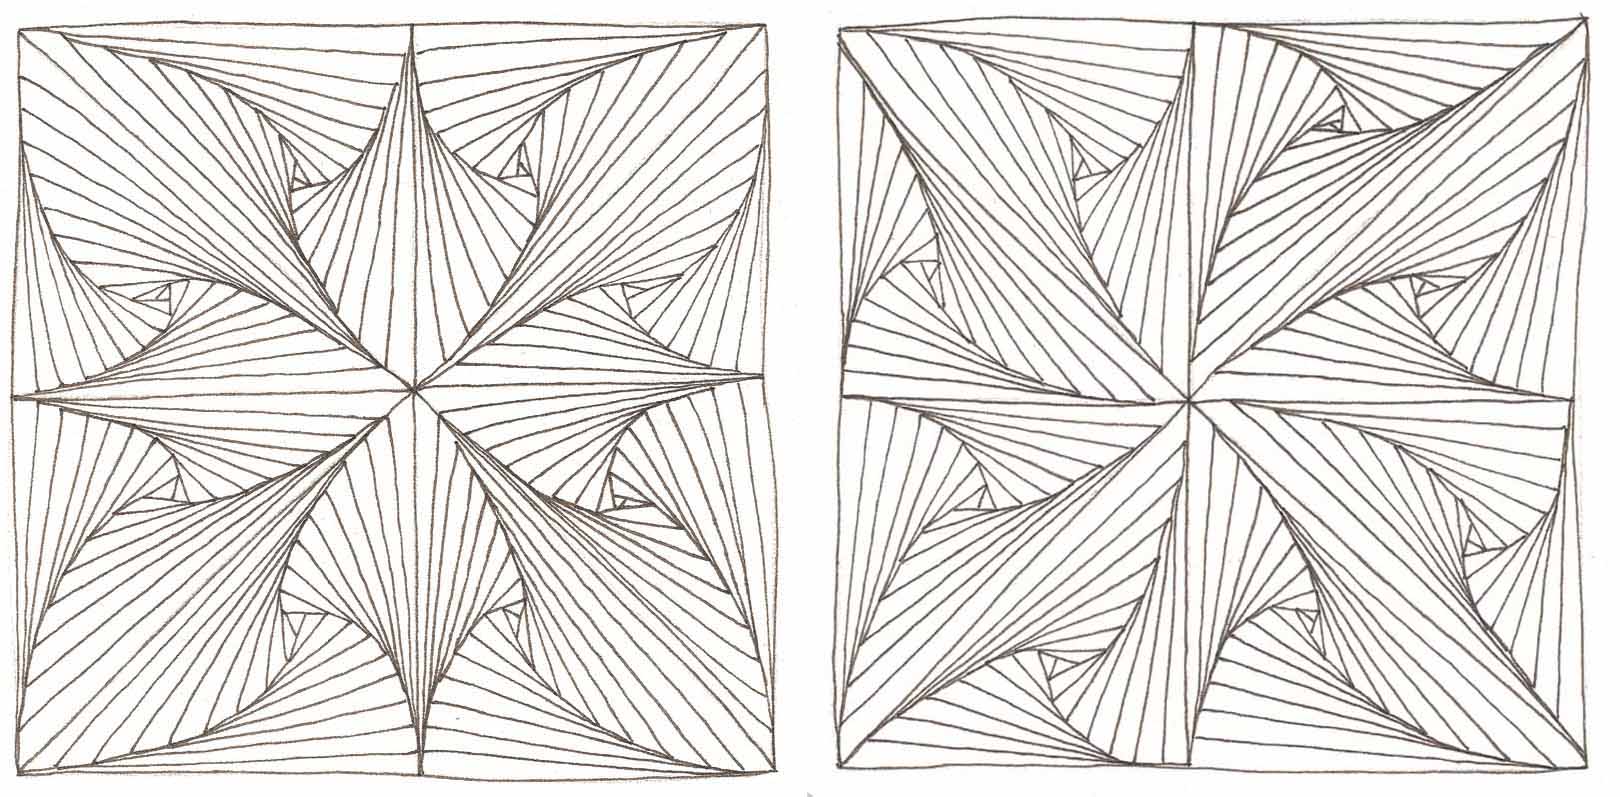
Here are a few of the beautiful stars you can create from just one string with just the one pattern! Can you detect the individual Paradoxes and their directions?
Of course, you can go on and on with this. There are so many different shapes and sizes to play around with! Go ahead and try it! I’d love to see what you come up with. You can send me your finished pieces at: info(at)zentangle.de
Happy tangling!!!
🙂